DIY Eyebrows Step by Step
When it comes to eyebrows, they can either make or break your entire look. But with so many options—thick, thin, arched, straight—how do you know which brow is right for you? The eyebrow is an area of thick, delicate hairs above the eye that follows the shape of the lower margin of the brow ridges of some mammals. Their main function is hypothesized to prevent sweat, water, and other debris from falling down into the eye socket, but they are also important to human communication and facial expression.
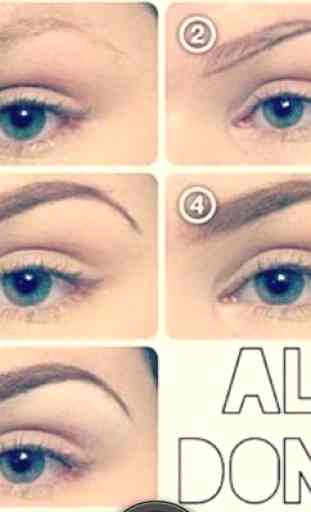
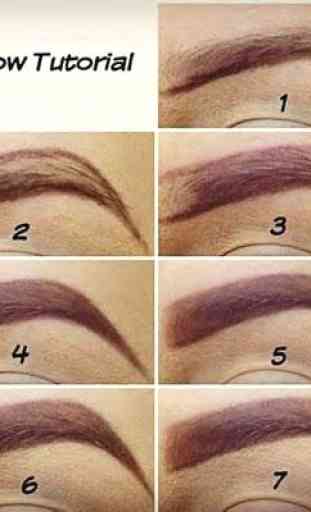
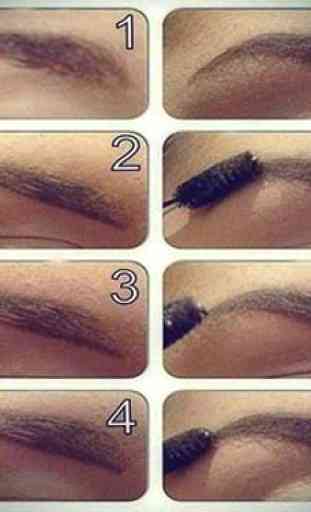
These are the steps to have a perfect eyebrow:Step 1: Trim It UpTrim any long hairs that stick up beyond the natural outline of your eyebrow with a pair of small scissors. Any lengthy hairs should now be similar in length to the rest of your brow hairs and lay flat more easily. Once you're done trimming, smooth the hairs in an arched shape with the spoolie brush. Sweep slightly up on the inner third of the brow and then outward the rest of the way.Step 2: Measuring 101Measure and mark your perfect, personalized brows with a brow pencil. Hold the pencil vertically along the side of your nose. Your brow should start directly above the center of your nostril in line with the vertical pencil. Use the pencil to make a small mark and repeat on the opposite side. These marks will serve as placeholders for your desired brow shape.Next, place the tip of the pencil across your cheek at an angle so that the bottom end hits just outside your nostril and slants along the outer corner of your eye. Your brow should end where the pencil hits on your brow bone. Mark this point with a small dot as well.Finally, look straight ahead and hold the pencil vertically just outside the outer edge of your iris. This point is where you want your brow to arch slightly. Mark this point with your pencil.Step 3: Color It InGet a feel for your new brow shape by filling it in with a brow pencil close to your natural hair color. If you are light-haired, opt for a pencil one or two shades darker than your hair color. If you are dark-haired, then choose a pencil one shade lighter than your hair color.Apply the brow pencil in small dash strokes using your markers as guides. Gently fill in sparse areas and focus on a gentle arched shape that reaches its peak just outside your iris. Keep the width of the brow around 1/4 inch and gently taper it on the outer half of the brow. If you have naturally sparse brows, you can use the pencil to plump up the outline of your brow around the edges or on the ends.Step 4: PluckInvest in a pair of slant-tipped tweezers that allow you to pick up specific hairs with ease. Remove hairs that fall outside of the shape you just mapped, plucking from the base of the hair. Grabbing from the base ensures you remove the specific hairs that fall outside of your desired eyebrow shape.
So, what are you waiting for? Download this application of DIY Eyebrow Step by Step. With this application of makeup tutorials step by step you will get to learn about eye make up. It is very easy, simple and practical. With the help of this app you'll be the star of the night at every party, wedding or any other occasion. Take a break and get inspired with these DIY, Eyebrow, tutorials!Enjoy and download now!
Category : Lifestyle
Related searches
Reviews (2)
A. G. u.
Apr 30, 2017
Havent opened yet but based on the reveiws it seems amazing
Love it