DIY Planter Box Ideas
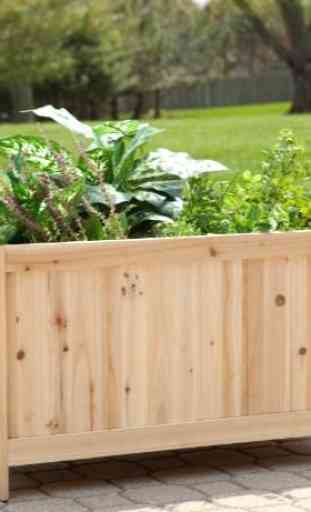
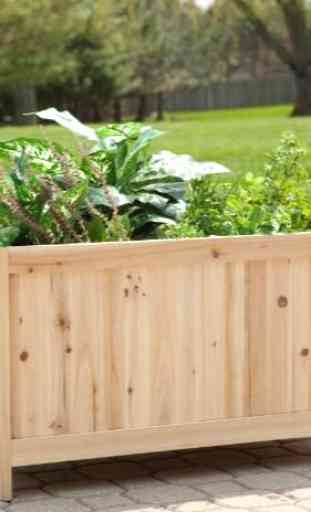
Building planter boxes is a very good project if you are interested in gardening. This article takes you through the steps of building your own planter box with cedar panels.
Planter boxes are very handy and functional items for any garden. They can be moved around occasionally to create a completely different look. They can also be used to decorate your patio, terrace, or decks. They are incredibly versatile and look great with multiple colors of flowers. These boxes come in many different materials and sizes, and you can easily buy one to suit your specific needs. Building one yourself is not at all difficult, you just need the necessary tools and materials.
Instructions
You will require the following materials:Cedar panelsStrong glueGalvanized nailsScrewsHandheld drillHammerSandpaperMethod:
The first step is to construct the top and the bottom frames of the box with 1 x 2 cedar strips. Now, join two cedar strips that are 26 inches in length with two other cedar strips that are 13 inches long to form a rectangular frame. Make sure that you measure the wood correctly before cutting it. All the cedar strips should be accurately cut to the precise measurement. Apply a bit of the strong glue at the edge of the wooden board, and then nail the boards together with a single galvanized nail. To hold the box structure more securely, drill along the corners with the handheld drill. Insert the screws in all the drilled holes and twist them firmly.
Now, place the two frames on their sides and apply a bit of glue to the inside of the bottom frame. Attach the four side panels on each side, and nail them from the inside to hold them more securely. Ensure that the panels fit properly on the frame. Apply a little glue on the inside of the bottom frame and attach the bottom panel. Make sure that the bottom panel fits perfectly over the planter box, and adjust until it fits snugly. Cut four wooden pieces which are around 2 inches in thickness and width and 13 inches in length. Attach these four pieces at the bottom of the box to form the base. Sand the edges of the box with a sandpaper to smooth out the edges and corners. Drill a few holes in the bottom panel for drainage. After this, you might like to apply a wood stain or paint to go with your home's decor. For a rustic look, you can even leave it unvarnished and unpainted.
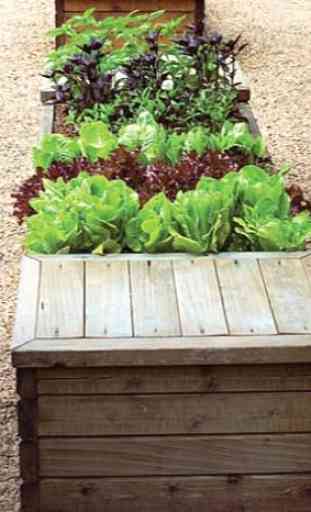
Vegetable Planter
To build a box for growing vegetables, you need to purchase two 18 gallon plastic storage tubs that are available in hardware stores. The tubs should be exactly the same size and shape so that one tub can slide into the other. Place a pond basket about 5 inches in diameter on top of the plastic, and trace around its circumference. With a sharp knife, cut out the traced circle. Now, set the pond basket right-side up on the cut plastic tub, and mark the height of the basket on the side of the tub. Cut the top half of the tub using the mark as the guide. On the uncut tub, drill a 1 inch hole. Slide the tub with the large bottom hole with one with the 1 inch hole. Place the pond basket inside the tubs, and fill it with potting soil. Through the 1 inch hole in the tub, slide a 3 foot length, 1 inch diameter PVC pipe for drainage.
Once you have built a simple planter you can try making a deck box too. These planter boxes are also recommended for people who live in apartments and want to grow a small and compact herb garden.
Planter boxes are very handy and functional items for any garden. They can be moved around occasionally to create a completely different look. They can also be used to decorate your patio, terrace, or decks. They are incredibly versatile and look great with multiple colors of flowers. These boxes come in many different materials and sizes, and you can easily buy one to suit your specific needs. Building one yourself is not at all difficult, you just need the necessary tools and materials.
Instructions
You will require the following materials:Cedar panelsStrong glueGalvanized nailsScrewsHandheld drillHammerSandpaperMethod:
The first step is to construct the top and the bottom frames of the box with 1 x 2 cedar strips. Now, join two cedar strips that are 26 inches in length with two other cedar strips that are 13 inches long to form a rectangular frame. Make sure that you measure the wood correctly before cutting it. All the cedar strips should be accurately cut to the precise measurement. Apply a bit of the strong glue at the edge of the wooden board, and then nail the boards together with a single galvanized nail. To hold the box structure more securely, drill along the corners with the handheld drill. Insert the screws in all the drilled holes and twist them firmly.
Now, place the two frames on their sides and apply a bit of glue to the inside of the bottom frame. Attach the four side panels on each side, and nail them from the inside to hold them more securely. Ensure that the panels fit properly on the frame. Apply a little glue on the inside of the bottom frame and attach the bottom panel. Make sure that the bottom panel fits perfectly over the planter box, and adjust until it fits snugly. Cut four wooden pieces which are around 2 inches in thickness and width and 13 inches in length. Attach these four pieces at the bottom of the box to form the base. Sand the edges of the box with a sandpaper to smooth out the edges and corners. Drill a few holes in the bottom panel for drainage. After this, you might like to apply a wood stain or paint to go with your home's decor. For a rustic look, you can even leave it unvarnished and unpainted.
Vegetable Planter
To build a box for growing vegetables, you need to purchase two 18 gallon plastic storage tubs that are available in hardware stores. The tubs should be exactly the same size and shape so that one tub can slide into the other. Place a pond basket about 5 inches in diameter on top of the plastic, and trace around its circumference. With a sharp knife, cut out the traced circle. Now, set the pond basket right-side up on the cut plastic tub, and mark the height of the basket on the side of the tub. Cut the top half of the tub using the mark as the guide. On the uncut tub, drill a 1 inch hole. Slide the tub with the large bottom hole with one with the 1 inch hole. Place the pond basket inside the tubs, and fill it with potting soil. Through the 1 inch hole in the tub, slide a 3 foot length, 1 inch diameter PVC pipe for drainage.
Once you have built a simple planter you can try making a deck box too. These planter boxes are also recommended for people who live in apartments and want to grow a small and compact herb garden.
Category : Lifestyle
Related searches